Lesson Title: Dare to Tangent
Unit Title: Circles and Their Properties
Teacher Candidate: Jenell Sellers
Subject, Grade Level, and Date: Geometry, 10th Grade, December 2nd, 2016
Placement of Lesson in Sequence and Lesson Rationale
This lesson is the fourth lesson of a four part unit where students will be learning about the properties and of circles. The lessons will progress from 1) Learning about the similarities between all circles, 2) Identifying the relationship between angles, radii and chords, 3) Constructing inscribed and circumscribed about a triangle, and 4) Creating tangents to a circle from a point outside of the circle.
Central Focus and Purpose
The central focus of this lesson is to assist students in understanding the function of creating a tangent to a circle. The students will be given directions on how to create a tangent by hand and also in Geogebra. Each student will be provided with a compass and a straight-edge and also a laptop. Students will use the class period to complete both activities
CCSS.MATH Content and Practice Standards
The Common Core State Standards that are covered throughout this four lesson unit are as follows;;
CCSS.MATH.CONTENT.HSG.C.A.1
Prove that all circles are similar.
CCSS.MATH.CONTENT.HSG.C.A.2
Identify and describe relationships among inscribed angles, radii, and chords. Include the relationship between central, inscribed, and circumscribed angles; inscribed angles on a diameter are right angles; the radius of a circle is perpendicular to the tangent where the radius intersects the circle.
CCSS.MATH.CONTENT.HSG.C.A.3
Construct the inscribed and circumscribed circles of a triangle, and prove properties of angles for a quadrilateral inscribed in a circle.
CCSS.MATH.CONTENT.HSG.C.A.4
Construct a tangent line from a point outside a given circle to the circle.
Prior Content Knowledge and Pre-Assessment
The prior content knowledge that the students will be building off of will be that of understanding of right triangles and the basic trigonometry.
Learning Target(s) and Plan for Clarifying Intending Learning
The learning target for this lesson will be “I can create a tangent to a circle using technology and by hand”.
| Strategy for using assessments to guide student learning |
| The goal for this lesson is to allow students to make the connection between completing a task by hand and also doing the same task via computer/using technology. This will help them also make more of a connection to how they might have to complete such a task in a job.
|
| Success Criteria (criteria for interpreting student success of the learning target) |
Plan for providing feedback and students’ monitoring of their own learning |
| The success criteria for this lesson will be an exit slip that they will have to complete in the last 5-7 minutes of the class period. The exit slip will consist of questions that will allow the students to express how well they understand the concept of creating a tangent line to a circle from a point outside of the circle and what help they might need in doing so.
|
The plan for feedback for the students during this lesson is to attend to each group during the lesson to see how they are doing on their graphs and to ask them open ended questions in order to get them to think a little bit more critically about the task at hand. I will also address all the misconceptions that are written down on the exit slips in the beginning of class the next day so that all of the students can anonymously get their questions answered. |
| Academic Language Demands |
| Language Function |
Vocabulary & Symbols |
Secondary Language Demand |
| · In this lesson, students will use the vocabulary to:
-Correctly address different pieces of the circle
-Construct a tangent to a circle both by hand and using Geogebra.
|
· Circle
· Tangent
· Point
· Center
· Radius
· Diameter
· Bisect
|
Mathematical Precision:
Students will have to pay close attention to the directions that they are given. Students will also have to understand the notation and the vocabulary in order to correctly follow the directions.
Syntax:
Students will have to
Discourse:
Students will be working on their own, however since the desks in the classroom are arranged in groups of four the students can easily collaborate with each other. They may discuss the activities during the class period but they also must each turn in their own work. |
| Language Support (instructional and assessment strategies) |
| Language Instruction |
Guided Practice |
Independent Practice |
| The teacher will begin the class period by explaining what a tangent line is; a drawing on the whiteboard in front of the class maybe necessary. To create a better visual for the students, the teacher may explain a tangent in a real-world scenario; the tires of a car on the road, for example.
The teacher will also show the students how to bisect a line and how to create a circle using their compass and straight-edge. These will be the two things that they will have to know how to do while they are creating the tangent by hand.
|
The teacher will guide the students by providing hints and tips on how to create the tangent to a circle when they are stuck either creating it by hand or when they are using Geogebra. Their handout will have instructions but it still might be possible that they get confused or lost. If the students need answers to questions the teacher will be monitoring the class throughout the period so that they are easily accessible to the students. |
After the teacher has introduced the lesson and handed out the worksheets and the laptops and the students are all signed in with Geogebra open and the materials needed are on their desk students will be able to get started. They may collaborate with those who are sitting in their group as long as each student turns in their individual work.
|
Differentiation, Cultural Responsiveness, and Accommodation for Individual Differences
Accommodations have been made for several students. One student with autism gets up and walks around a lot during class so in order to help him focus he sits on an exercise ball so that he can bounce in his seat so that he’s not disrupting the class. This actually works extremely well; he can still tell you exactly what his thought process is even though he’s still bouncing up and down.
Another student with autism needs to sit closer to the front of the room in order to help him visually because he has fairly poor eye sight. Every now and again he will have some outbursts out of frustration but he only needs reassurance that he’s doing okay. There is a para-educator for the classroom that helps out with his frustrations and calms him down as well.
The ELL students in my class have a hard time with the language barrier, so in order to help them out with the language barrier and to also, hopefully, improve their English reading skills I have worked with the Spanish teacher and he helped me translate the worksheet done in English into Spanish. The ELL students will receive both sheets so that they are able to see the Spanish and English translation and make a connection between the Spanish words and the English words.
Materials – Instructional and Technological Needs (attach worksheets used)
The materials needed for this activity are:
-Handouts with the instructions
-Compass
-Straight-edge
-Laptop with the Geogebra Application
-Pencil and Eraser
| Instructional Plan (detailed explanation for thing the lesson) |
| Pacing |
Teacher Activities |
Student Activities |
| Before |
Before the class period starts the teacher will need to ensure that each student will be able to have their own laptop and that each laptop also will have Geogebra downloaded already; this is to minimize wasted time and distractions by the students being online. The teacher will also need to ensure that each student will have a compass and a straightedge. Extra paper will also be necessary in case the students will want to practice or make a mistake. |
The student activity will be to create a tangent line to a circle using the Geogebra application on a provided laptop and also creating the same construction by hand. |
| During |
The teacher will introduce the topic of tangents and explain what a tangent is. In order to make a real-world connection for the students to relate to, the teacher might be able to explain that a tangent can also be thought of a tire of a car and the road that it’s driving on; a circle with a line touch the edge but not crossing through. The teacher will then explain that the students will be constructing a tangent to a circle using the Geogebra application on the laptops that are provided and also by hand with the provided tools. The teacher will monitor each table group and help students who have any questions and those who need assistance. If there seems to be a common misconception then the teacher may address the whole class and correct the common error that is occurring throughout the class. The students will have to turn in their worksheets at the end of class. They will also be able to print out their work that was done in Geogebra so that the teacher will be able to assess whether they understand the Geogebra application enough to operate it for another lesson. |
After students receive all of the necessary materials they will begin working on their handouts. Students may collaborate with their tablemates if need be. The students will be given instructions on how to create the construction but then they must be able to also do it on their own. |
| After |
Ten minutes before class is to end the teacher will instruct the students to put away all of the materials and to clear their desks so that they can fill out the exit slip. The students will be able to complete the exit slip within the last 5-7 minutes of class. Afterwards the teacher will make sure that all of the laptops have been returned and properly stored in the laptop cart and that all of the compasses and straight-edges are back in their appropriate boxes. The teacher will collect all of the exit slips and all of the handouts and prints from the students and review what the students have been able to accomplish throughout the lesson. |
The students will need to swiftly put all of the materials away and turn in their handouts with the print out of their work in Geogebra. The last 5-7 minutes of class they will be working on their exit slip until the bell rings and they are dismissed. |
Dare to Tangent
Learning Target: I can create a tangent to a circle using technology and by hand.
Ready for a challenge?! Your mission today is to construct a tangent to a circle. This will be done by hand and also using Geogebra, the master of all things Geometry!
You may begin with either activity. Manage your time wisely, students of mine, for everything must be turned in in its entirety at the end of class!
Geogebra Instructions:
Construct, in Geogebra, a tangent line to a circle through a point not on the circle.
Directions:
- Using the ‘Graphics’ tab, get rid of the axes that are visible when you open the application.
- Using the Circle tool, create a circle of a size that is convenient to work with.
- Create a point that is outside of the circle, call it P.
- Now, using the line tool to create the line AP
- Using the other line tool, bisect AP.
- Using the point of intersection, create a circle whose center is the intersection and whose radius diameter is AP.
- Notice how this creates two intersections between the two circles you have created? Plot a point on each of these intersections using the Point tool.
- Now, create a line that connects the original point that is not on the circle and the two points that you just created. Voila!
- Clap your hands once, raise a fist in the air and proclaim “Boomjam!” You have just created tangents to the circle using a point not on the circle! Print out your masterpiece as it will have to be turned in with the rest of the handout.
Manual Instructions:
Construct, using a compass and a straight-edge, on a separate piece of paper the following using the scheme that is provided below:
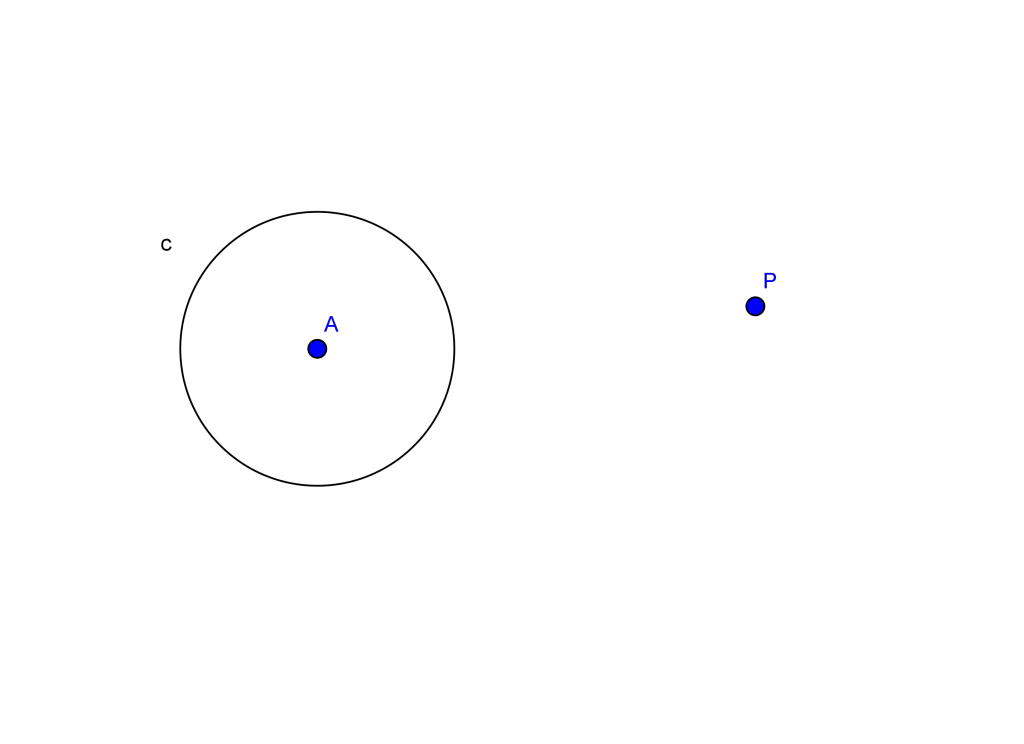
Given a circle C and a point P not on C, construct a line through P and tangent to C.
Given:
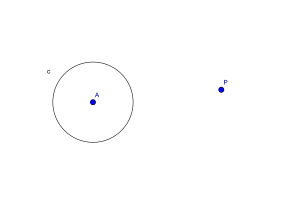
Scheme:
- Draw AP
- Bisect AP; giving point D
- Create circle with center D and radius AD; giving points T and S
- Draw PT and PS
- Clap your hands twice, raise your fist in the area and yell “Boomjam Again!” You just created a tangent to a circle by hand!
Exit Slip
What was the most difficult/challenging aspect to the activity today?
Did you receive any help during this challenge? From whom (peers, friends, teacher, etc.)?
On a scale from Basic, Proficient to Mastery, how comfortable are you in performing this task in a stressful setting (quiz, exam)?